How to create a Satisfaction Survey
- Go to settings | Incident Management | Satisfaction Survey

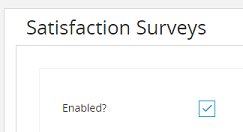
- Click the check box to enable the satisfaction survey
- Set the option to send satisfaction survey every N ticket's
Note: N is the amount of tickets that will be submitted before a survey is sent

-
Enter the text you would like to appear on the satisfaction survey submit page

-
Set the send to option 5.1 Any user = All users 5.2 Selected Groups = the survey will only be sent to the groups you specify

- select the send when ticket category
6.1 Any category = a survey will be sent to any ticket category
6.2 Selected categories = the survey will only be sent to the categories you specify

- Select the option for send when ticket is
7.1 Any kind = a curvey will be sent regardless of the ticket type
7.2 Created from selected service requests = The survey will only be sent when the ticket is created from a specific service request type

- Select any custom fields that you want from the left side of the screen to add to your service template. Note: You can drag and drop the custom fields
8.1 Give the field a label
8.2 Select if the field is required on the form to submit
8.3 Select the field width
8.4 Fill out your custom fields

8.5 Click apply to save the custom field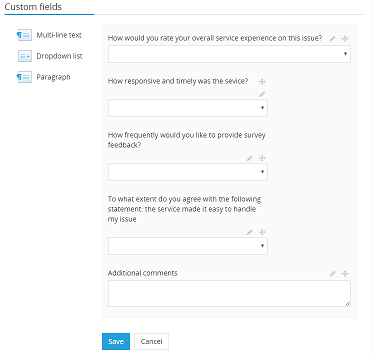
How to create a satisfaction Survey video tutorial