Installing and Configuring the SiteAgent Service (Required)
- Select the "Settings" option from the BOSSDesk sidebar menu.

- Scroll to the "Configuration Management" section of the "Settings" page.
- Select the "SiteAgent" option.

- On the "SiteAgent" Page on the right-hand side, select the "New SiteAgent" button.

- Enter a name for this instance of the SiteAgent (We recommend using the name of the domain) and click "Save".

- Enter a name for this instance of the SiteAgent (We recommend using the name of the domain) and click "Save".
- Copy the displayed API key to somewhere for later use in the server installation.

- Return to the main "SiteAgent" page by clicking the "SiteAgent" tab at the top of the screen.

- Select "Download SiteAgent".

- Move the downloaded installer to the prepared Windows Server. (Hint: right click on the installer, check properties, if there is an option to "Unblock", select it.)
- Run the installer and complete the installation steps. Once the installation is complete and you click finish, a window should open prompting you to configure the agent.
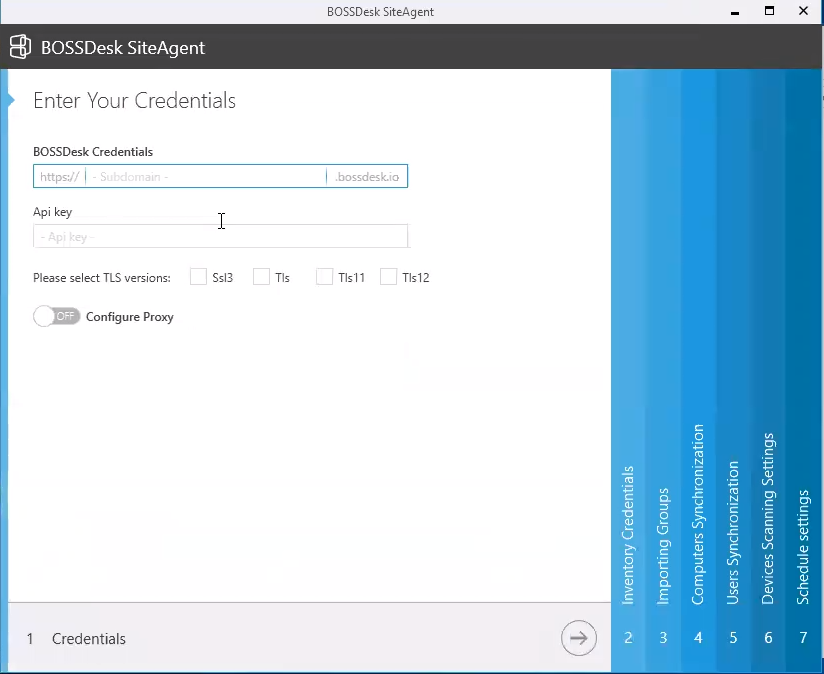
- In the configuration window, enter the name of your BOSSDesk instance (what preceeds ".bossdesk.io" in your url) and paste the API key you copied earlier into the designated API field. Select the TLS version you wish to use and click next.
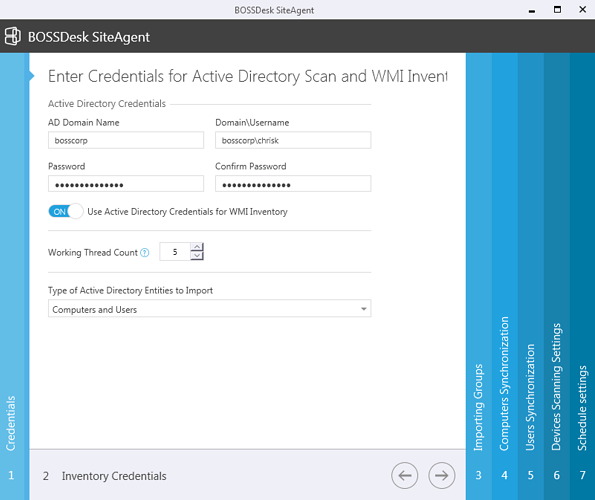
- Enter the hostname for the domain controller, as well as the credentials for the domain user mentioned in the prerequisites into the allotted fields and click next.
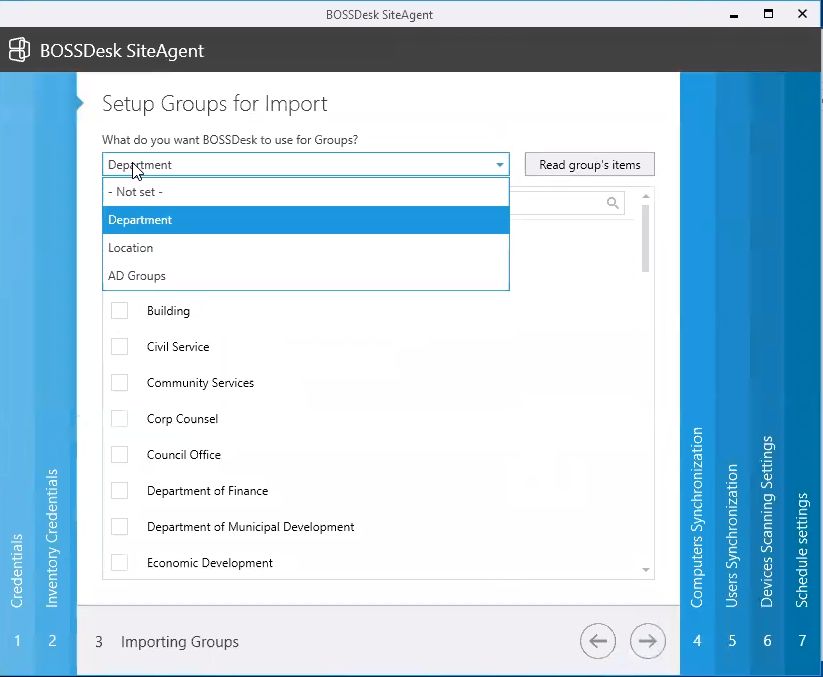
- Select the import group you want used by BOSSDesk, followed by clicking Read group items. (Note: If a list of items are disaplayed then we are able to communicate with AD)
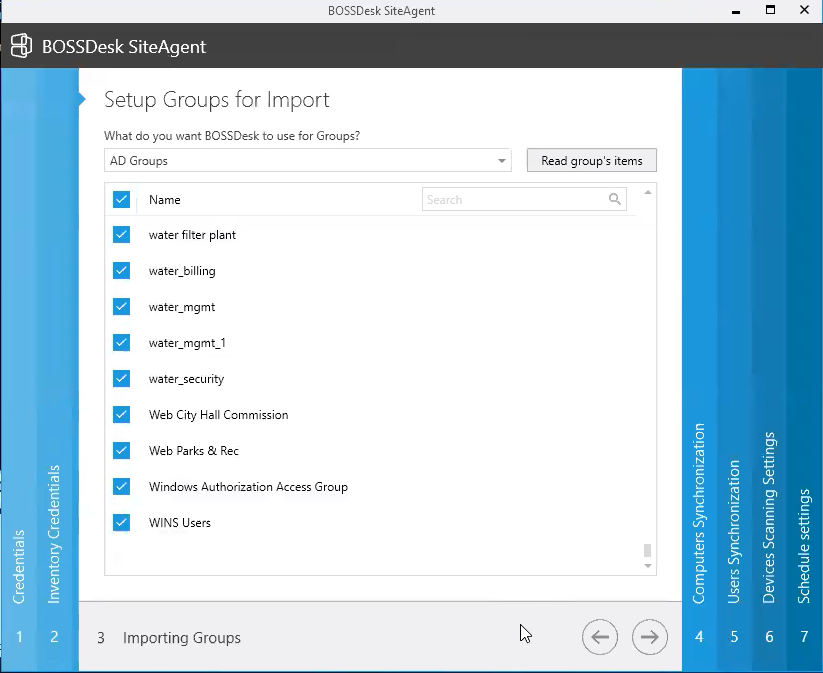
- Select which groups you would like AD imported into (Note: This does not have any barring on what AD account's get imported. This is only the group that the accounts get imported into.) Once a group or multiple groups are selected, click next.
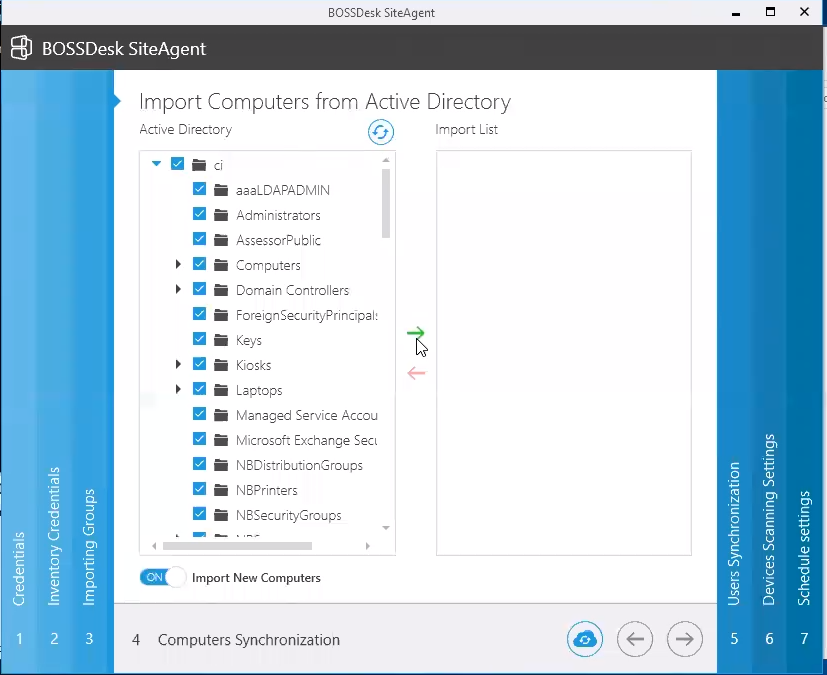
- Click the refresh button and then select the OU's that you want to import computers from. Once you have the OU's selected press the green arrow to move them into the import list. Click on the blue cloud, followed by the green checkmark to have the computers imported. (Once the collecting and sending data is finished you can click on the grey forward arrow.)
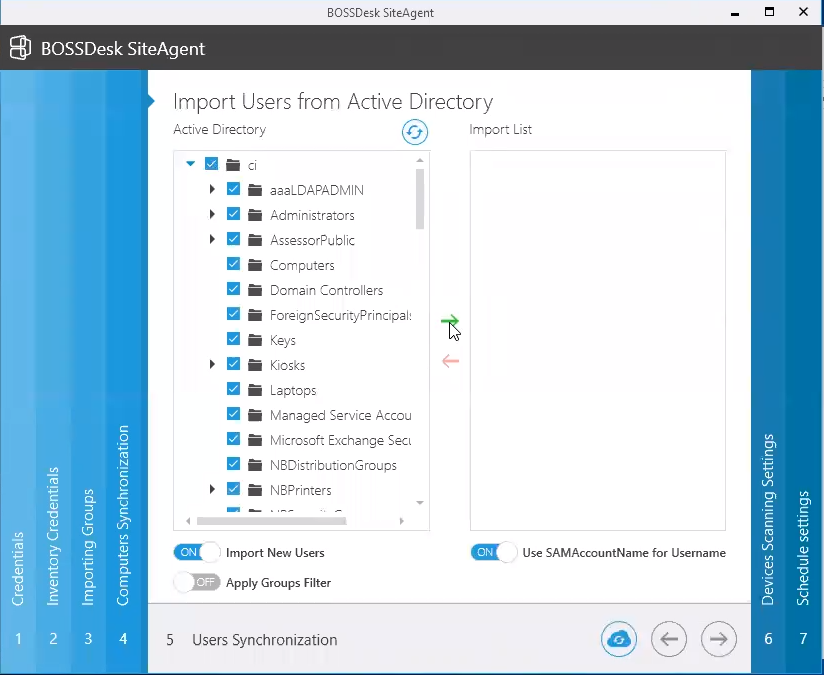
- Click the refresh button and then select the OU's that you want to import users from. Once you have the OU's selected press the green arrow to move them into the import list. Click on the blue cloud, followed by the green checkmark to have the users imported. Once the collecting and sending data is finished you can click on the grey forward arrow.
- (Note: Some customers use legacy user names. To tell if you are using legacy user names check if you are using the pre-Windows 2000 field in AD for login. In AD under a user’s profile there are two fields for username. The first field is the UPN logon name with the second field being the pre-Windows 2000 username. They should both have the same information listed. If not, then you are using legacy user names. If using legacy user names, you will have to enable the option Use SAMAccountName for Username.)
- (Note: Some customers use legacy user names. To tell if you are using legacy user names check if you are using the pre-Windows 2000 field in AD for login. In AD under a user’s profile there are two fields for username. The first field is the UPN logon name with the second field being the pre-Windows 2000 username. They should both have the same information listed. If not, then you are using legacy user names. If using legacy user names, you will have to enable the option Use SAMAccountName for Username.)
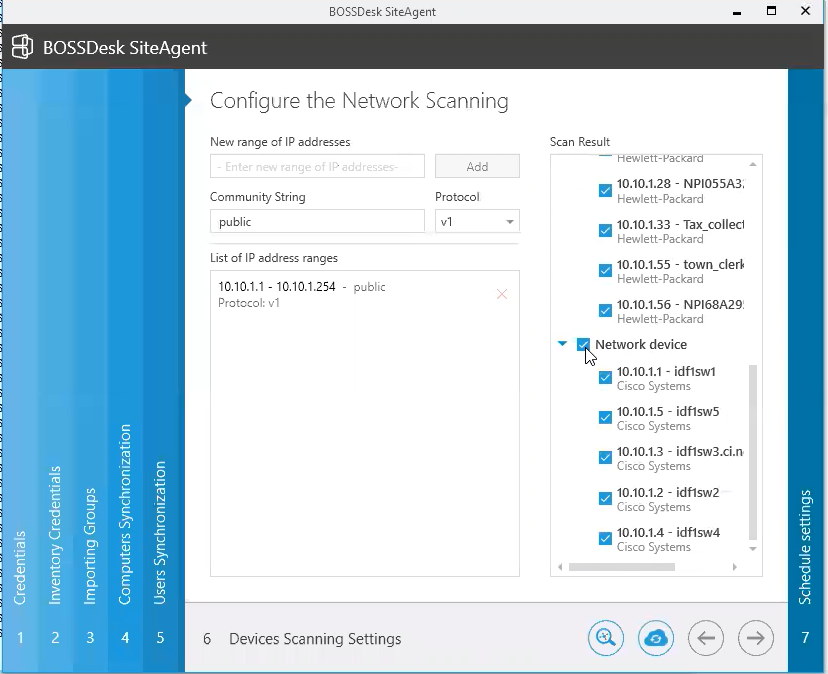
- Configure network scanning (Note: SNMP scanning will be used to pick up printer's, routers and switches provided the correct community string was entered. Wild cards are not supported in the IP ranges. The ranges must start and end with an IP e.g. 10.10.1.1 – 10.10.1.254 with a community string of Public) Once the range is entered click Add. Click on the magnifying glass followed by the green check mark to start the scan. Select all the devices you want added under the scan results and then click the blue cloud to sync the devices.
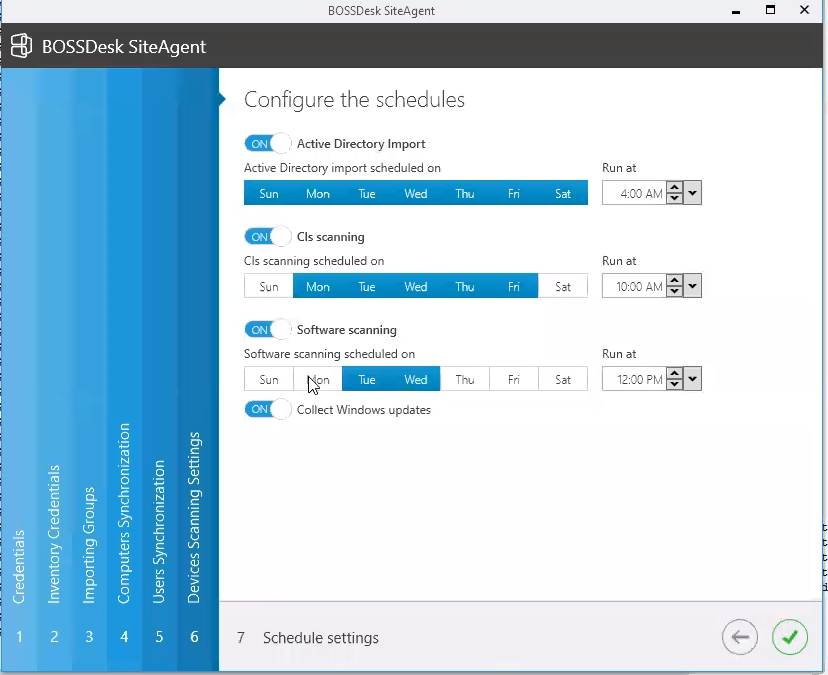
- Configuring the schedules. Enable Active Directory import and set the import to everyday at 4:00AM. Next you will want to enable Cls scanning and set it for Monday - Friday at 10:00AM (Note: The WMI scanning process will last about 10 seconds per machine. The machines have to be on for the WMI scan to work) Enable sofware scanning and set a date and time that works best for your environment. This process takes longer than the hardware WMI scan. Lastly, if you would like to collect Windows update information then you will need to enable collect Windows updates
- Click on the green checkmark to confirm the SiteAgent settings. The SiteAgent is now configured.