USER GUIDE
Dashboard
Dashboard Screen and Functionality
BOSSDesk is designed to display a variety of data summaries to quickly track details such as service request tickets, ticket assignments and workload. A variety of “widgets” dynamically analyze the data/information and present pictorial summaries. All widgets and fields are maintained by the administrator.
Widgets are meant to consolidate details while highlighting the circumstances that need to be managed. Some widgets act as a link to the data/information represented by the widget information.
When you click certain widgets, its’ corresponding screen opens. For instance, when you click on 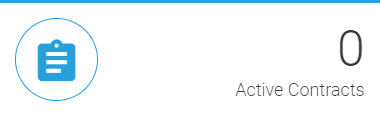 the Contracts screen opens. This screen gives you a searchable list of contracts.
How to add/change/remove dashboard widgets
When the Dashboard is opened for the first time, no widgets are displayed. After clicking the  button, all of the available data widgets are listed. Under the Categories column you will see a breakdown of how many widgets are available in each category. The first entry in this column is All. When you select All, all of the available widgets will be listed in the right-hand column. Review each widget. When you find a widget you would like to add to the Dashboard, click on
  , the button now displays On dashboard. When finished, click
  .
.
When you re-open the Dashboard, the selected widgets are now displayed. Widgets can be dragged and placed anywhere on the screen. To remove a widget, hover over the widget and click on the  in the upper right corner to remove it.
Configuration Management Data Base (CMDB)
CMDB Screen
In this screen, BOSSDesk allows you to track information about assets as well as attach relevant documents and set alerts for contract expiration dates. Specific screens allow vendor management with complete visibility, giving you control over any given contract from its inception to its renewal or cancellation. You can also track and manage purchases and assets by automating the purchase workflow.
CMDB gives you access to information such as Software, Contracts, Vendors and Purchase Orders as indicated by icons at the top left of the screen. This screen also allows you to change the Settings, complete an advanced search or see a detailed view of the entries in the CMDB by clicking the  icon in the upper right-hand of your screen.
Advanced Search
Select the  icon to add a filter group to the selected columns.
After highlighting a selection in the Columns > Available columns list, click the ![]() at the bottom of the list to add your selection to the Selected columns list. To clear a selection in the Selected columns list, highlight the entry and click the
at the bottom of the list to add your selection to the Selected columns list. To clear a selection in the Selected columns list, highlight the entry and click the ![]() . This action removes the selection and places it back in the Available columns list.
. This action removes the selection and places it back in the Available columns list.
You can also reorder the filter groups by highlighting your selection and clicking the ![]() or
or ![]() arrows. Click
arrows. Click  when the Selected Columns list is complete to temporarily save your changes, additions or deletions. To permanently save your changes, click
  . A new screen opens where you can now label the name of the search. You can also assign this new search as a “Global” search by placing a check mark in the box.
Click  when complete, or
  to cancel the operation.
Detail View
Selecting the icon lists information related to the item checked in the Name column. A new screen opens with detailed information specific to your companies’ needs. Fields are set-up and maintained by the administrator. Custom fields, notes and attachments can also be added to further identify the item.
The Detail view screen lists general information pertaining to your initial selection in the CMDB screen.
CMDB Functionality
To Find an Existing CI
To search for a specific item, type a value into the simple search field. Results are dependent on the available fields. The simple search results will list below the simple search field.
Create a CI
To create a CI, click the [Create CI] icon. A new screen opens giving you access to the Create a new CI form. Your CI form is customized by the administrator. Required fields are marked with an asterisk.
Click when complete, or to cancel the operation.
Bulk Edit
To complete a Bulk edit, filter the CI list using a search function. Place a check mark in the box next to the name. Click the [Bulk Edit] icon. You can now change the Type, Status or Location of the CI as well as add tags and contracts.
Click  when completed, or to cancel the operation.
Archive
Archive explanation
To archive the CI, select the CI or CIs you want to archive and place a check mark in the box(s) next to the name(s). Click the  icon, and click "Archive" in the dropdown. A new screen opens;
Click [Yes] to confirm, or to cancel the operation.
Restore
Restore explanation
To restore the CI or CIs, select the CI or CIs you want to restore and place a check mark in the box(s) next to the name(s). Click the icon and click "Restore". A new screen opens; Wait! Are you sure you want to restore these CIs?
Click [Yes] to confirm, or to cancel the operation.
Tools
These tools are SiteAgent Tools and are established in the Settings section by the administrator. If the tool you are looking for is not available, contact the administrator.
Bulk Delete
To complete a "Bulk delete", select the CI or CIs you want to delete and place a check mark in the box(s) next to the name(s). Click the  icon. A new screen opens; Wait! Are you sure you want to delete these CIs?
Click [Yes] to confirm, or to cancel the operation.
CMDB – Software
The Software screen tracks information specific to each software package -down lists allow you to select sub-fields. A search field is also available to search by name or manufacturer from existing entries.
Detail View
To review detailed information about a specific entry, place a check mark in the box next to the item you want to review. Click the [Detail view]. A new screen opens giving you general information about your selection.
From this screen you can edit this information by clicking the ![]() icon. A new screen opens giving you a drop-down lists and a free-form field. Click when complete, or to cancel the operation.
icon. A new screen opens giving you a drop-down lists and a free-form field. Click when complete, or to cancel the operation.
Add New Software
To add a new software package, click the [Add new software] icon. A new screen opens with free-form fields and/or drop-down boxes where you can either make a selection or add new information.
Click when complete, or !cancel button to cancel the operation.
CMDB – Contracts
The Contracts screen tracks information specific to each contract. You will have drop-down boxes with information specific to your company.
Add a New Contract
To add a new contract, click the icon and fill out the appropriate fields.
- Vendor – a free-form field to add the Vendors’ name. This could also be a drop-down box if your company has a specific list of vendors from which to choose.
- Title – a free-form field
- Number – a free-form field to add the contract number
- Amount – a free-form field to add the cost of the contract
- Type – a drop-down box or a free-form field to add the type such as a maintenance or warranty contract
- Billing cycle – this could be a drop-down box or a free-form field to add how the contract is billed; it may be monthly, quarterly, bi-annually or annually
- Start date – a free-form field to enter the start date of the contract
- End date – a free-form field to enter the end date of the contract
- Invoice number - a free-form field to add an invoice number
- Purchase number - a free-form field to add a purchase number
- Renewal date - a free-form field to add a renewal date
- Cancelled - a check box
Click when complete, or to cancel the operation.
CMDB – Vendors
The Vendors screen tracks information specific to each vendor. A simple search field is also available to search by vendor name from existing entries.
Detailed View
To view detailed information about vendors, click on the icon. A new screen opens giving you general information about each vendor in your database.
Edit
You can edit this information by selecting a vendor and clicking the ![]() icon. A new screen opens giving you free-form fields to edit existing information. You also have a free-form field for Notes.
icon. A new screen opens giving you free-form fields to edit existing information. You also have a free-form field for Notes.
Click when complete, or to cancel the operation.
Add a New Vendor
To add a new vendor, click the icon. Available fields include:
- Name – add a free-form text identifier i.e., a company name.
- Support URL – add a free-form text identifier i.e., [http://www.company.com]
- Address – a free-form field to add the vendors address
- Contact information - free-form fields to add the vendors’ name, E-mail, Phone, Mobile and Fax number
- Notes - a free-form field to add notes
Click when complete, or to cancel the operation.
CMDB – Purchase Orders
The Purchase Orders screen tracks information specific to each purchase order.
A search field is also available to search by order number or vendor name from existing entries.
Detailed View
To view detailed information about purchase orders, click on the [Detail view] icon. A new screen opens with a list of purchase orders in your database.
Edit
You can edit this information by selecting a purchase order and clicking the ![]() icon. A new screen opens giving you free-form fields to edit including the Number, Requester, Vendor, Order, Require, Receive dates, Payment terms, Price adjustment, Shipping cost, Tax rate, billing and shipping addresses and Shipping information. You also have a free-form field for Notes.
icon. A new screen opens giving you free-form fields to edit including the Number, Requester, Vendor, Order, Require, Receive dates, Payment terms, Price adjustment, Shipping cost, Tax rate, billing and shipping addresses and Shipping information. You also have a free-form field for Notes.
Click when complete, or to cancel the operation.
Copy, Print, Send as E-mail
In [Detail View], you can also copy, print or send as E-mail several purchase orders by clicking on the appropriate icon.
Add a New Purchase Order
To add a new purchase order, click the [Add a new purchase order] icon. Complete the following fields:
- Number – a free-form field to add the purchase order number
- Requester - a free-form field to add the name of the person requesting the item
- Vendor – a drop-down box or a free-form field to add the name of the vendor
- Order date – a free-form field to add the order date
- Require date –a free-form field to add the date the item is required by
- Receive date – a free-form field to list the date the item was received
- Payment terms - a free-form field to add the payment terms
- Price adjustment a free-form field to add any price adjustments
- Shipping cost - a free-form field to add the shipping costs
- Tax rate – a free-form field to add the tax rate
- Billing address – a free-form field to add the billing address
- Shipping address – a free-form field to add the shipping address
- Shipping information – a free-form field to add shipping information
- Notes – a free-form field to add notes
Click when complete, or to cancel the operation.
Tickets
The Tickets screen tracks information specific to incidents and service requests. Drop-down lists allow you to narrow your search for established tickets. By selecting an item from the drop-down lists, tickets specific to your search criteria will populate the list. You can also use the Free-form Search field to find a specific ticket.
Click on the ticket number to open that ticket. A count of displayed tickets is shown in the upper left corner of the Tickets screen.
Advanced Search
An Advanced Search is a robust capability used to define, save and re-execute complex filtering criteria. It contains filtering groups and associated filters where “all” or “any” of the filtering groups can be applied to the return set.
The columns available for an Advanced Search filter contain all data associated with a ticket.
Add a Filter Group
To add a new filter group:
Click on the icon. This step opens the Advanced Search configuration form.
To define a filter group, click on the  button.
A drop-down list appears “Show results where [all] or [any] of the following match” can be selected. For example, use the “any” option to select records where the status = “Incoming” or the status = “Assigned”. If you need both conditions met to select a ticket, use the “all” option.
button.
A drop-down list appears “Show results where [all] or [any] of the following match” can be selected. For example, use the “any” option to select records where the status = “Incoming” or the status = “Assigned”. If you need both conditions met to select a ticket, use the “all” option.
Add a Filter
To add a new filter:
- Click on the “Add a filter” button.
- Select the filter from the drop-down list. Filters are dynamically defined based on the field selected. If a needed field is not available, contact the administrator for access or resolution.
- The second drop-down list “is” or “is not” can be selected.
- The third drop-down list allows you to choose the status of the ticket. These are dynamic fields that change based on your selections above.
Continue adding as many filters as needed.
When finished, click the button – this option saves your choices for this operation only.
Click to permanently save your changes by naming the “Search”. A free-form field opens to name the search you just established. If you want this new saved search to be a Global search, click on the check box.
Create a New Ticket
To create a new ticket, click the icon. Complete the following fields:
- Requester - a free-form field to add the name of the person filling in the ticket
- Category – a drop-down list of categories specific to your company (populated by the administrator)
- Agent – a free-form field to add the name of the agent
- Type - a drop-down list of the type of ticket, i.e., incident, service request
- Priority – a drop-down list of priority levels, i.e., critical, high, medium
- Extended status - a drop-down list of the current status, i.e., in progress, on hold
- Title – a free-form field to add the requesters’ title
- Notes – a free-form field to add notes
Click when complete. The ticket will be forwarded to the appropriate area. Click to cancel the operation.
Merge Ticket
The "Merge Ticket" option enables you to consolidate information from two distinct tickets into a single, unified ticket. This functionality eliminates the need to handle redundant tickets related to the same information or problem. By merging similar tickets, you can address and resolve issues more efficiently, enhancing overall ticket management.
You can also Merge tickets in bulk by selecting them all at once. This feature facilitates the easy merging of multiple tickets.
To Merge ticket follow the steps described in the chapter Instructions to Merge Tickets
To Bulk Merge ticket follow the steps described in the chapter Instructions to Bulk Merge Tickets
Clone Ticket
The "Clone Ticket" option offers you the ability to duplicate master information from an existing or reference ticket. This feature eliminates the need to recreate the same ticket type or address a recurring error. By cloning tickets, you can save time and leverage existing information for the creation of new tickets.
To Clone ticket follow the steps described in the chapter Instructions to Clone Tickets
Problems
In this screen you can add a problem associated with an existing ticket. You can also keep track of problems that have already been entered. You can track the tickets’ progress as the problem is resolved.
New Problem
To add a new Problem, click the icon on the Problems screen. A new screen opens giving you free-form fields and drop down boxes to summarize the problem. Each field allows you to maintain an on-going narrative as the problem is resolved.
Click when complete, or to cancel the operation.
To add a new Problem to an existing ticket, select the ticket. The screen pertaining to that ticket will open. Click the  icon, then click the button. A new screen opens giving you free-form fields and drop down boxes to summarize the problem. Each field allows you to maintain an on-going narrative as the problem is resolved.
Click when complete, or to cancel the operation.
Edit a Problem
To edit a problem that has already been entered, select the problem. A new screen opens with the information previously entered. To edit the entire entry, click the main ![]() icon. To edit individual entries, click the
icon. To edit individual entries, click the ![]() icon associated with that entry.
icon associated with that entry.
After you have finished editing your entries, click [Update], or to delete your changes.
Changes
Releases
Service Catalog
The Service Catalog lists all of the types of service requests. Service requests are grouped by service category. The Service Catalog screen contains two columns. The left column is a list of Service Categories showing the number of each type of service request. The right column is a list of the service request types for the selected Service Catalog item.
Service Categories
The Service Categories column is populated with items specific to your companies’ needs. When you select a service category, a new screen opens listing all sub-categories within that service category.
When you click on a specific service request type, a new screen opens giving you access to free-form fields and drop-down lists where you can give a description of the service request.
These fields are dynamically driven by what is defined in Settings.
Users
Each user in BOSSDesk is assigned a specific level of access or “role”. If no role is assigned, that user can only access the Service Catalog to request a service. Role access is defined in Settings – Roles. You can customize each role to limit or grant permissions. You can also customize user functionality as needed to match the responsibilities of each user in the organization.
Once a role is defined, it is associated with a user on the Users screen.
To quickly find an established user, use the drop-down lists. You also have the option of using the search field to find a user by name or username.
Add a New User
To create a new user, click the [Add a new User] icon and complete the following fields:
- Username – a free-form text identifier assigned to each user. Each Username must be unique.
- First name – a free-form field to record the user’s first name.
- Last name – a free-form field to record the user’s last name.
- E-mail – E-mail address associated with this user.
- Designation
- Location – drop-down list of locations; maintained in Settings.
- Phone – optional telephone number to contact this user.
- Mobile – optional mobile telephone number to contact this user.
- Other Email – optional secondary E-mail address to contact this user.
- Time Zone – drop-down list of world-wide time zones. Used to properly process time-based processes.
- Tags – optional drop-down list of world-wide time zones. Used to properly process time-based processes.
- Password & Password confirmation – the password assigned to this user account
Click when complete, or to cancel the operation.
Editing or Deleting User Information
To edit information about an existing user, use the search field to find the user. Click on the [user’s name]. A new screen opens with information specific to that user. To edit the information, click on the ![]() icon. To delete, click the icon.
icon. To delete, click the icon.
Click when complete, or to cancel the operation.
API Key
The API key provides a way for mobile applications and other third-party integrations to perform requests on behalf of the user. When the user's API key is compromised (e.g. a lost smart phone), the API key can be re-generated from the web application to disable access to the account.
Reports
The Reports screen displays a list of available reports that can be generated from the database. Reports are broken down into six different categories:
- CMDB
- Tickets
- Problems
- Changes
- Timesheets
- Users
The list of reports will be customized and maintained by the administrator.
Knowledge Base
BOSSDesk Knowledge Base provides a repository where you can gather, analyze, store and share knowledge and information. The Knowledge base screen gives you access to relevant articles as well as a list of categories, each representing a specific area in BOSSDesk. Knowledge Base articles are added in Application Settings and maintained by the administrator.
You can also use the search field to find specific articles and information.
Change Logs
BOSSDesk Change Logs track all changes made to data in the application. This feature records the user who took the action, the type of action taken (with before/after values when applicable), and when the action was taken.
Each item in the Change Log includes the name of the user, the object affected by the action, an action type (create, update), a ‘before’ and an ‘after’ summary of the action taken and a date/time stamp of when the action was taken.
The list can be filtered by user and object type (attachment, note, ticket routing rule, ticket, ticket response, and user). A count of the selected items is shown in the upper right corner of the screen.
When accessing the Change Logs screen, you can make a selection by using the drop-down list. This list gives you access to existing information. You can also use the search field.
Tools
Import
You can import data to your account by selecting the type of data you want to import from the drop-down lists of data types. Choose the CSV file and click the  button. The drop-down list on the Tools > Import screen gives you several options, depending on which category is selected.