Download and Install SiteAgent
SiteAgent Overview
The Site Agent section in Asset Management allows you to track and assign assets to specific locations or departments, ensuring accurate asset allocation and inventory management. It also provides visibility into asset distribution across your organization.
How to Download SiteAgent?
You can download SiteAgent to enable automated asset detection, tracking, and management across multiple locations.
Step 1: Download the Installer
Navigate to Settings > Assets Management > Site Agent.

The SiteAgent page is displayed.
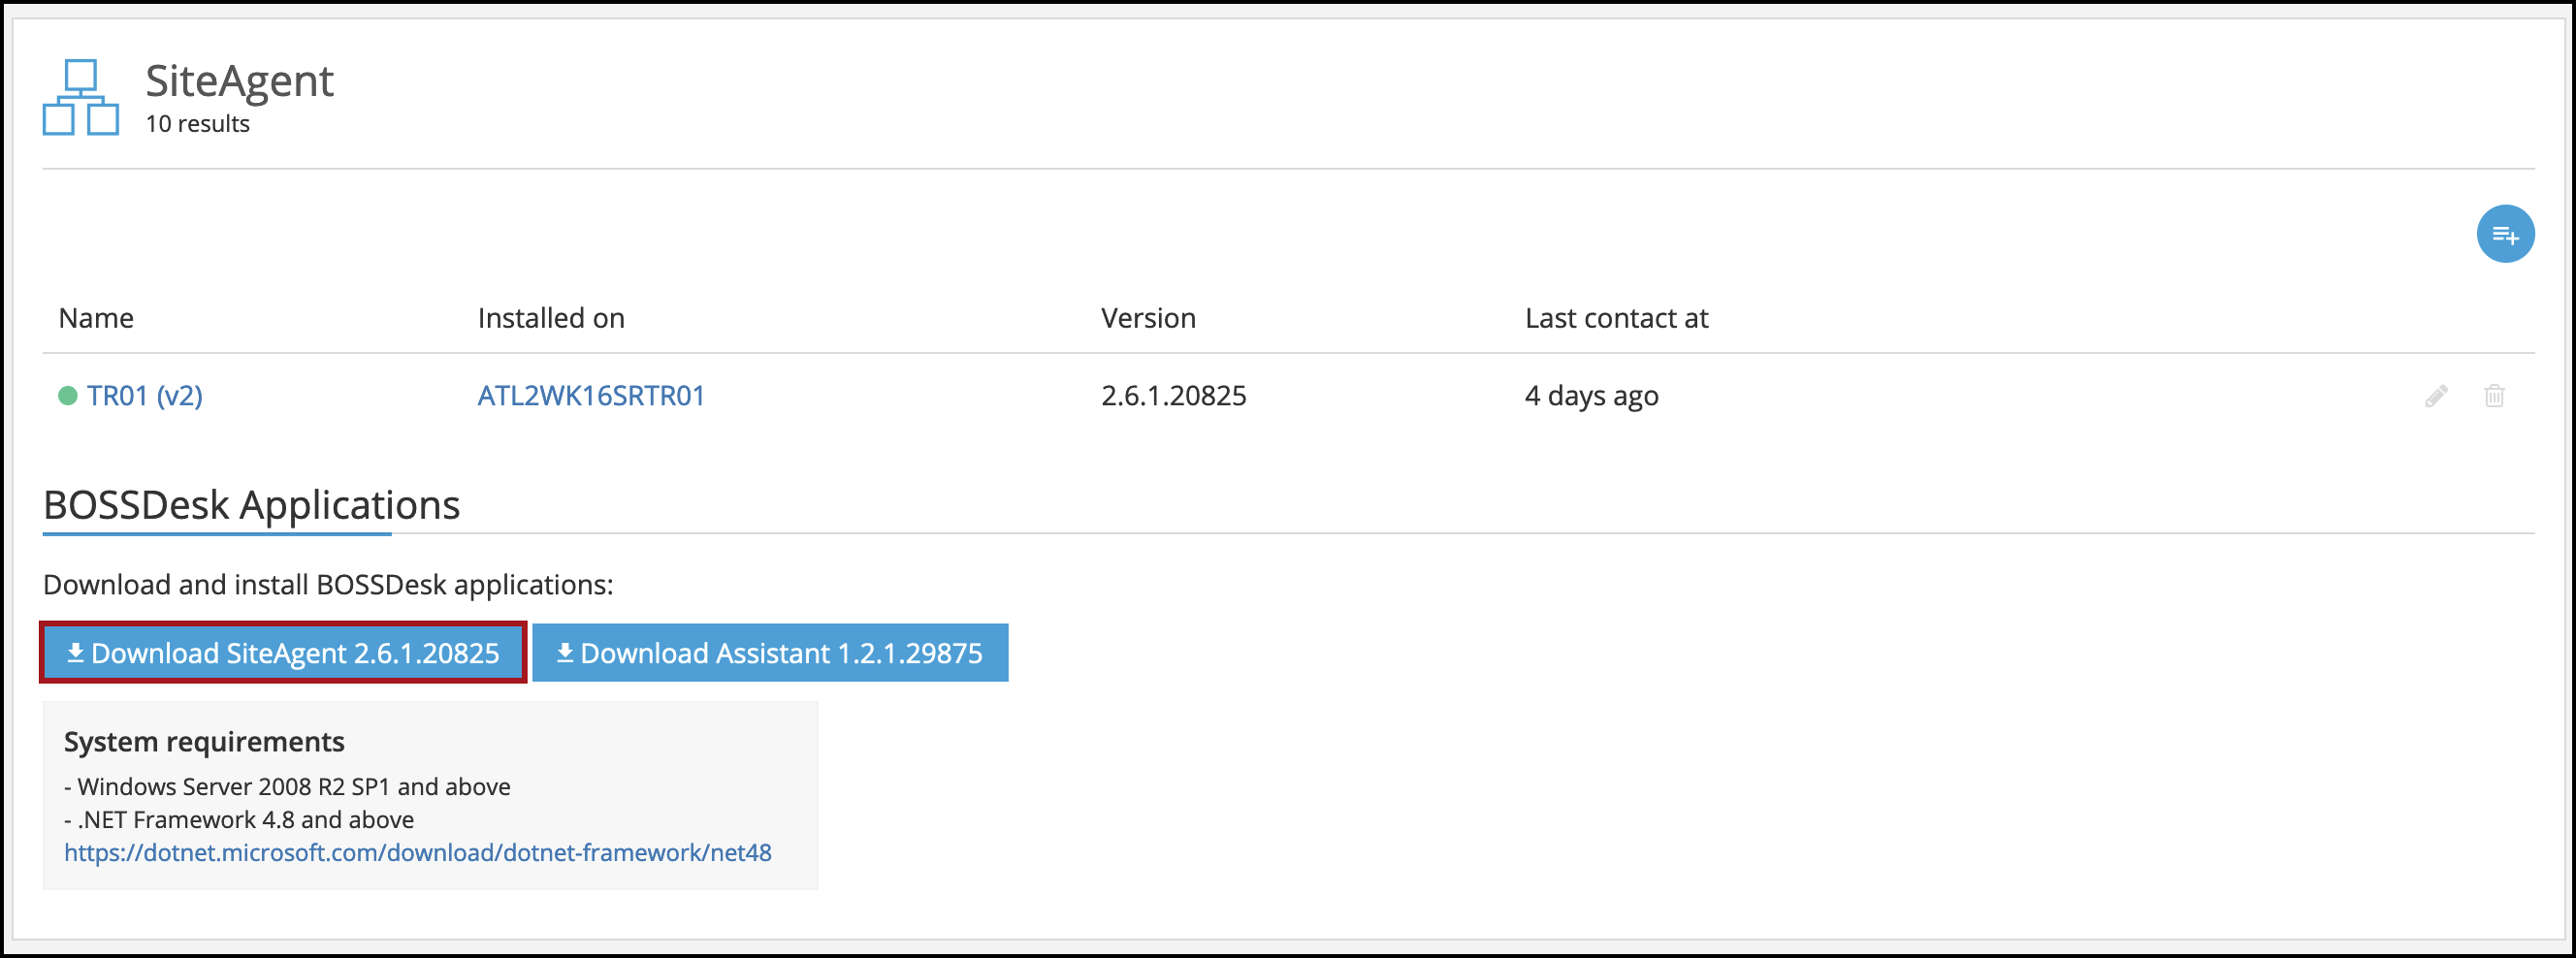
Click Download SiteAgent 2.6.1.208 to download the installer.
Note: This is the latest version available, but it may change with future updates.
The BOSSDesk SiteAgent installer is downloaded to your system.
Step 2: Start the Installer
Launch the installer.
Note:
- If a block is applied, ensure you grant the necessary permissions to allow the setup.
- To install the SiteAgent, ensure the following requirements are satisfied:
- Windows Server 2012 R2 SP1 and above
- .NET Framework 4.8 (Download here)
The BOSSDesk SiteAgent Setup Wizard dialog is displayed.
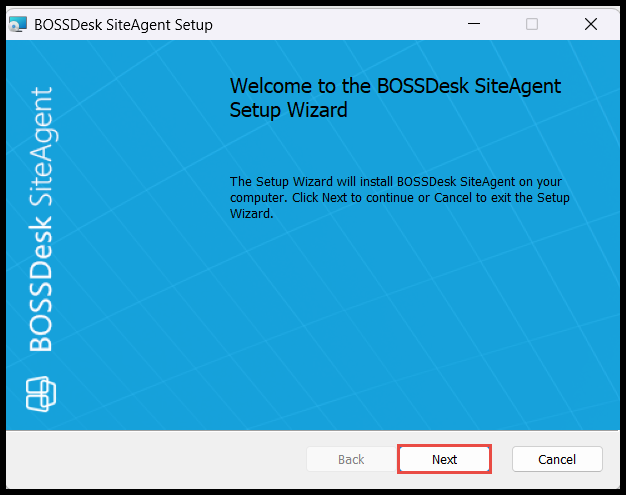
Click Next.
Step 3: Agree to License Terms
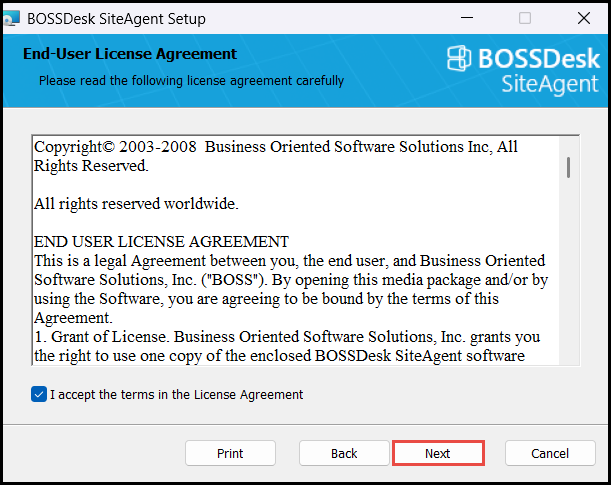
After thoroughly reading the license, check the box I accept. and click Next.
Step 4: Select Destination Folder
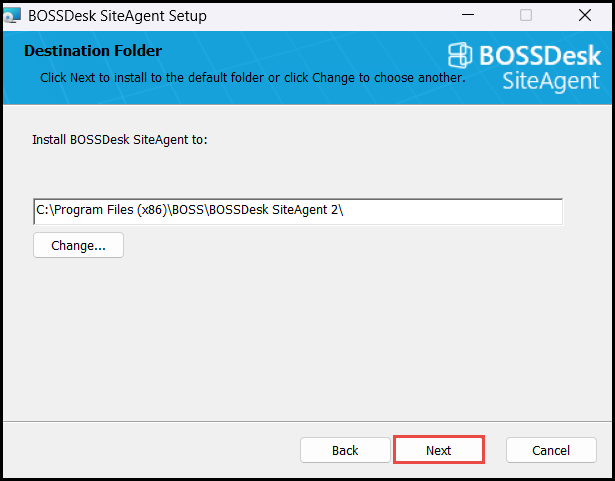
Select the destination folder on your system and click Next.
Step 5: Provide API Credentials
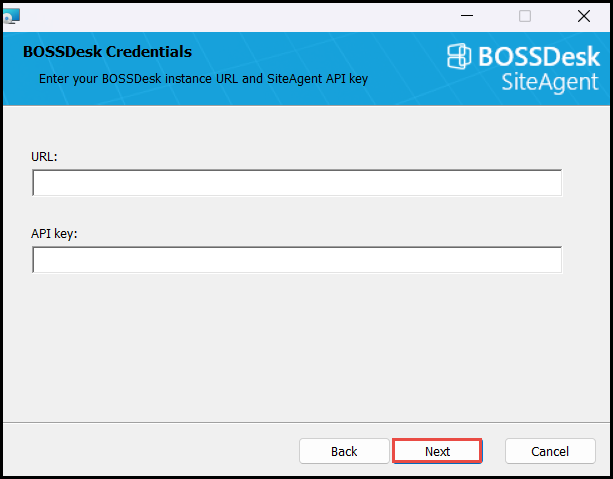
Enter the URL and API Key for BOSSDesk. Then click Next.

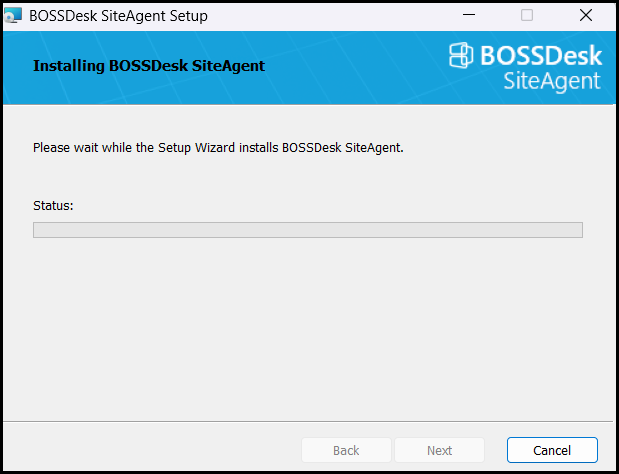
Now the wizard is ready to install. Click Install.
Once the installation is complete, click Finish.
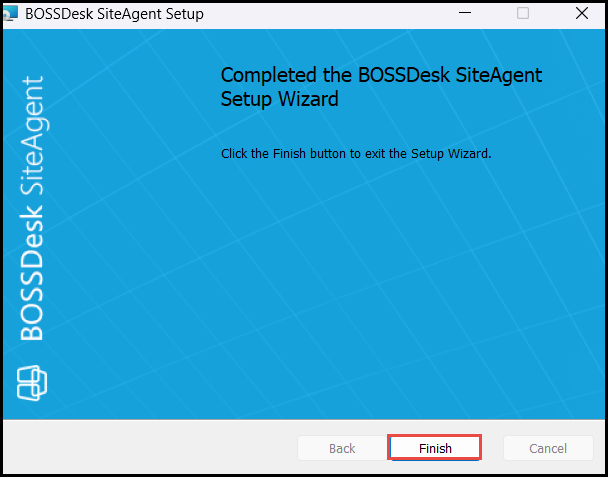
Allow the app to make changes and complete the installation.
The BOSSDesk SiteAgent is successfully installed.
How to Edit SiteAgent?
You can edit the SiteAgent to ensure that credentials, Active Directory access, WMI-based inventory, user and computer synchronization, and scheduled scans are up-to-date for accurate asset management.
Step 1: Select the SiteAgent
Navigate to Settings > Assets Management > SiteAgent. The SiteAgent page is displayed.
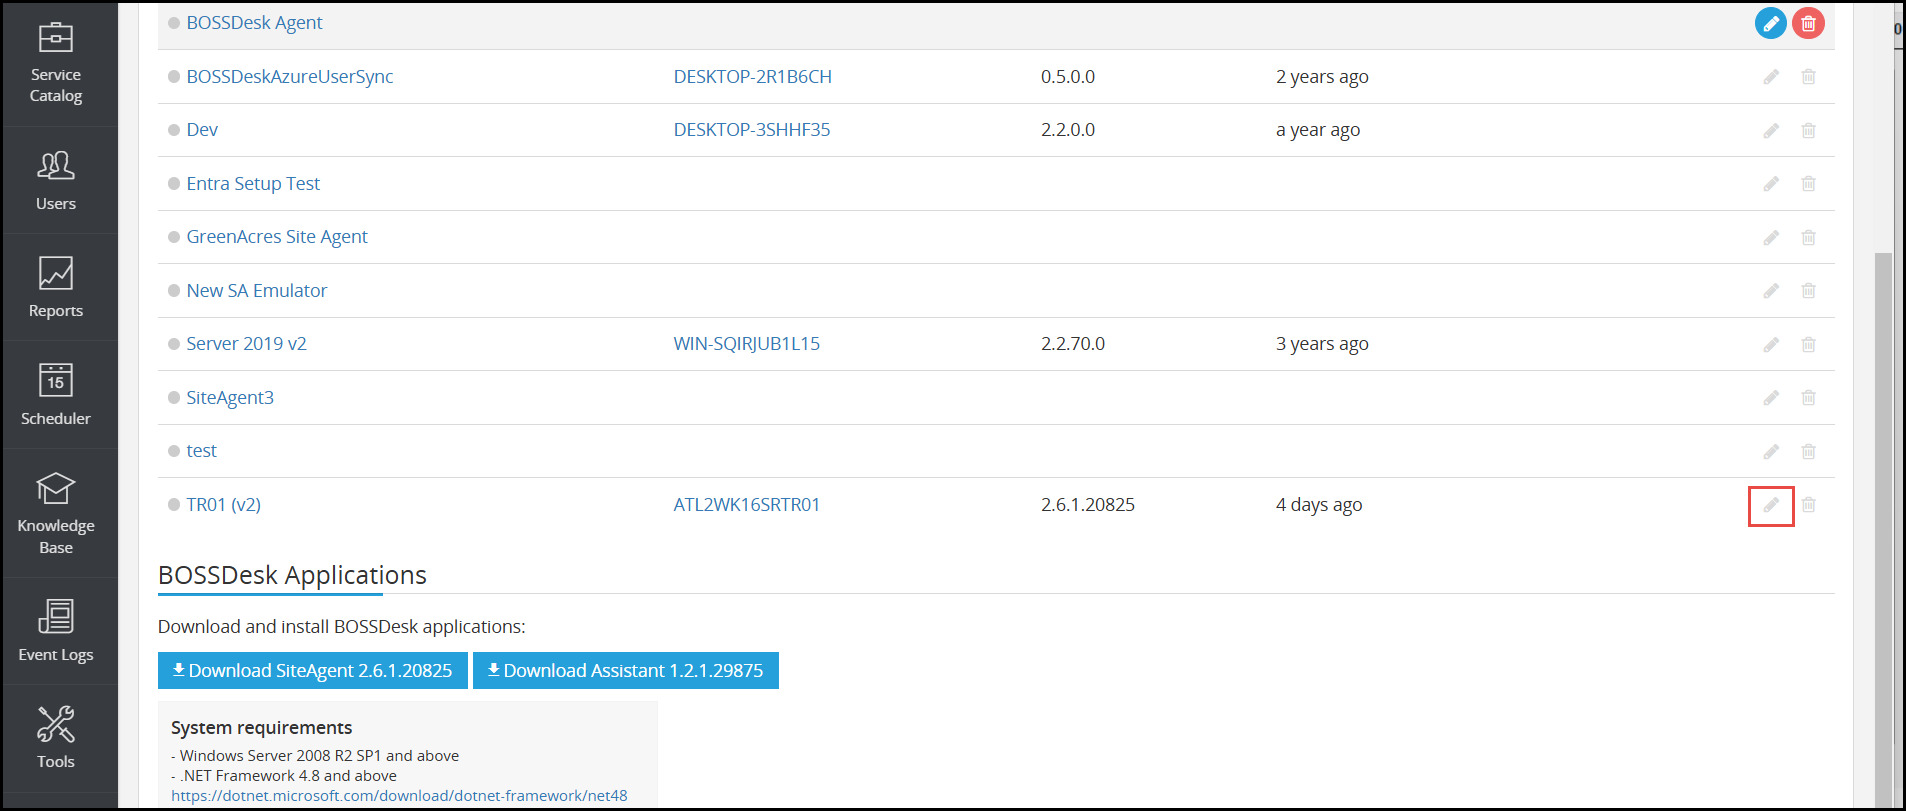
Click the Edit icon in the row of the SiteAgent you wish to update.
Note:
- The account used in SiteAgent must have Active Directory rights to perform inventory tasks.
- It must have WMI call permissions and be a local admin on all inventoried machines.
- Most users prefer a domain account, but any account with the proper rights can be used.
Step 2: Provide Credentials
The Edit SiteAgent page is displayed.
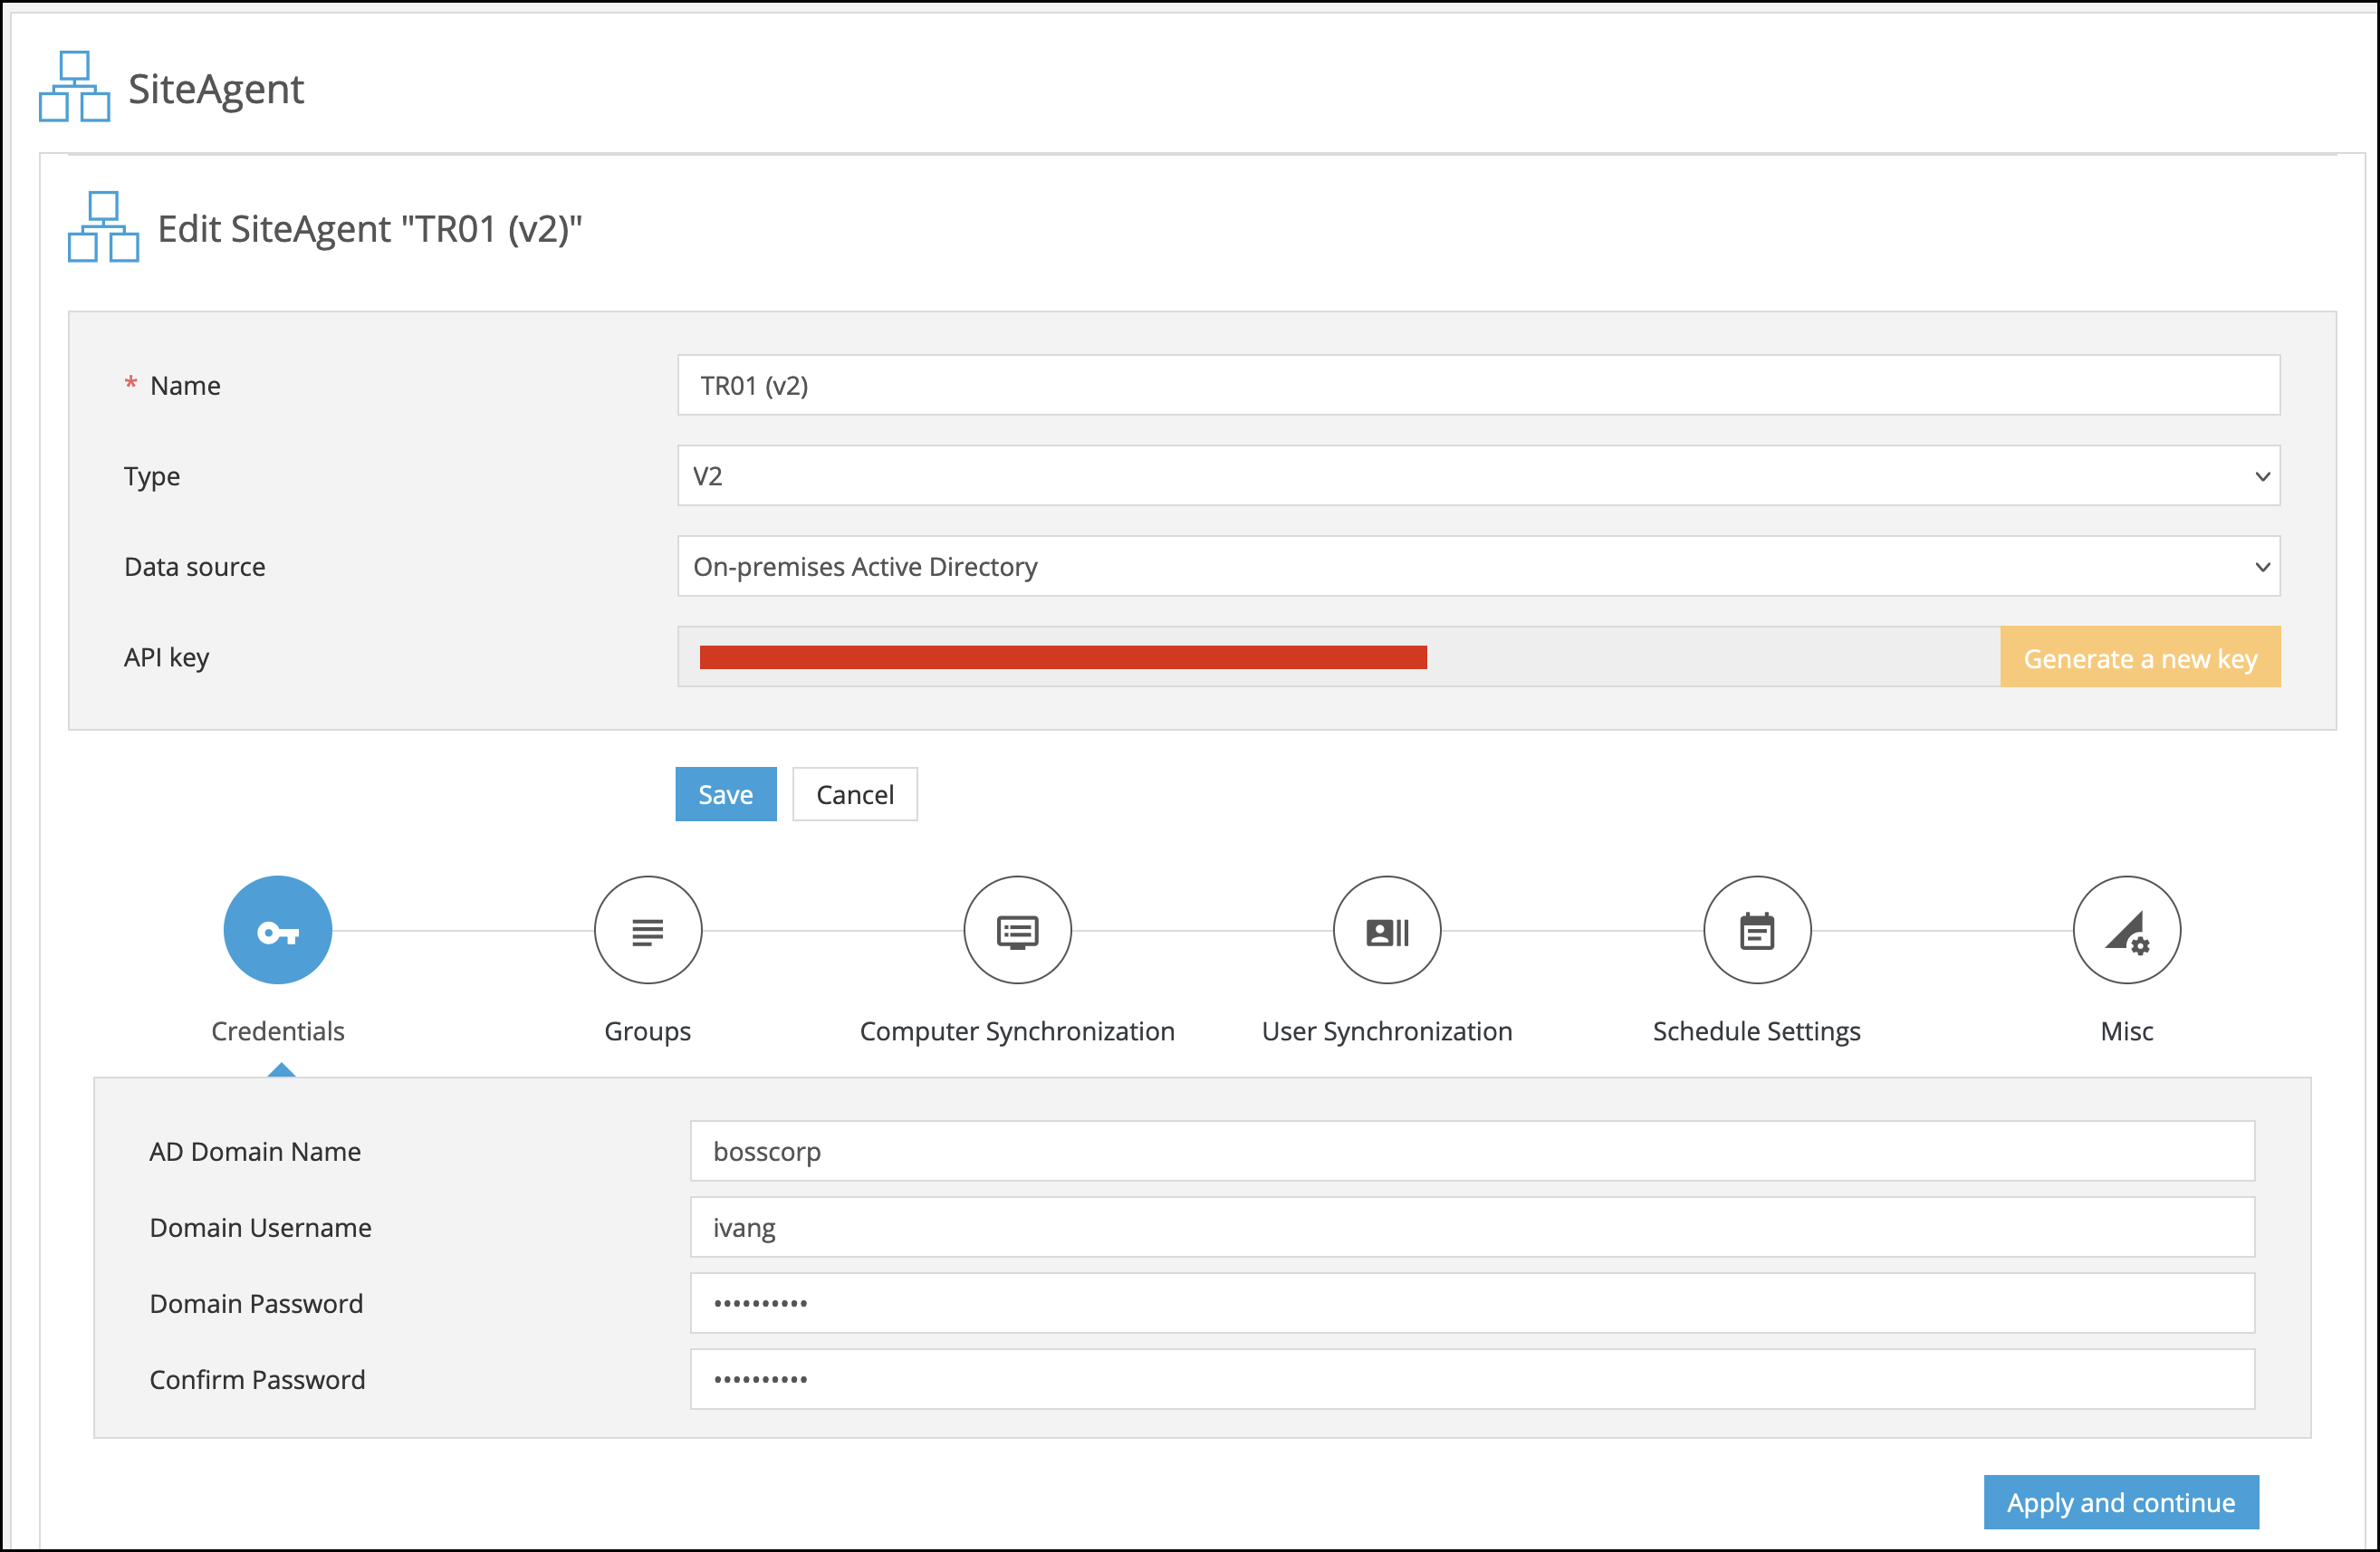
Navigate to the Credentials tab.
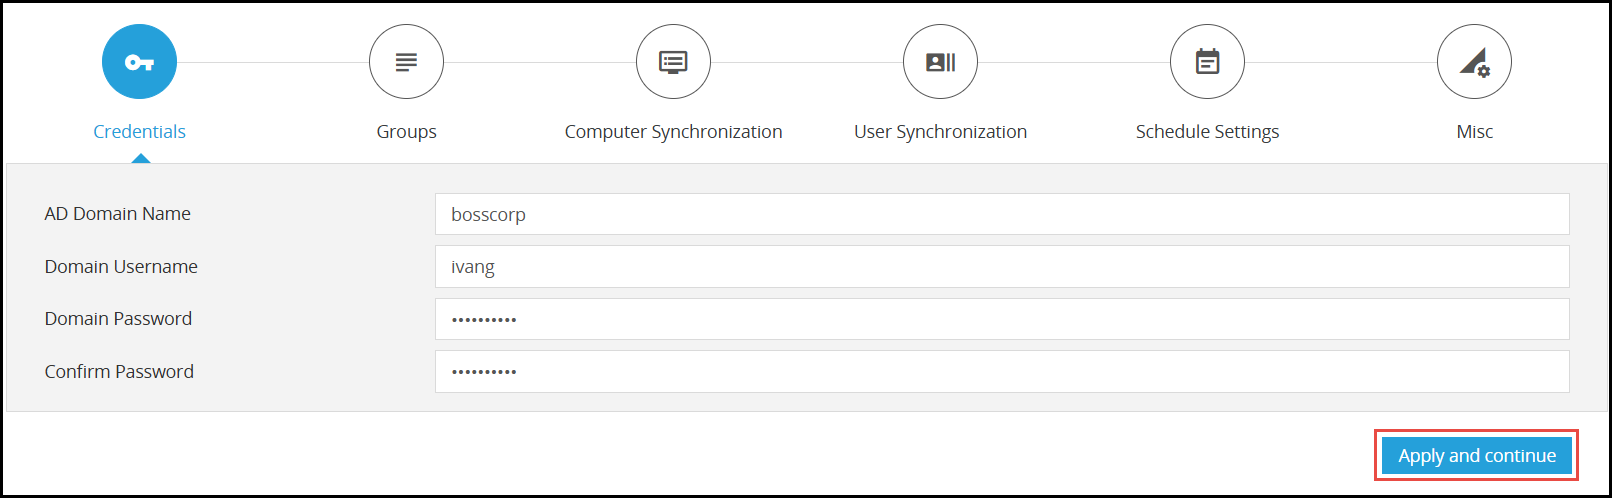
Enter the details in AD Domain Name, Domain Username, Domain Password, and Confirm Password fields respectively. Then click Apply and continue.
Step 3: Select Groups and Units
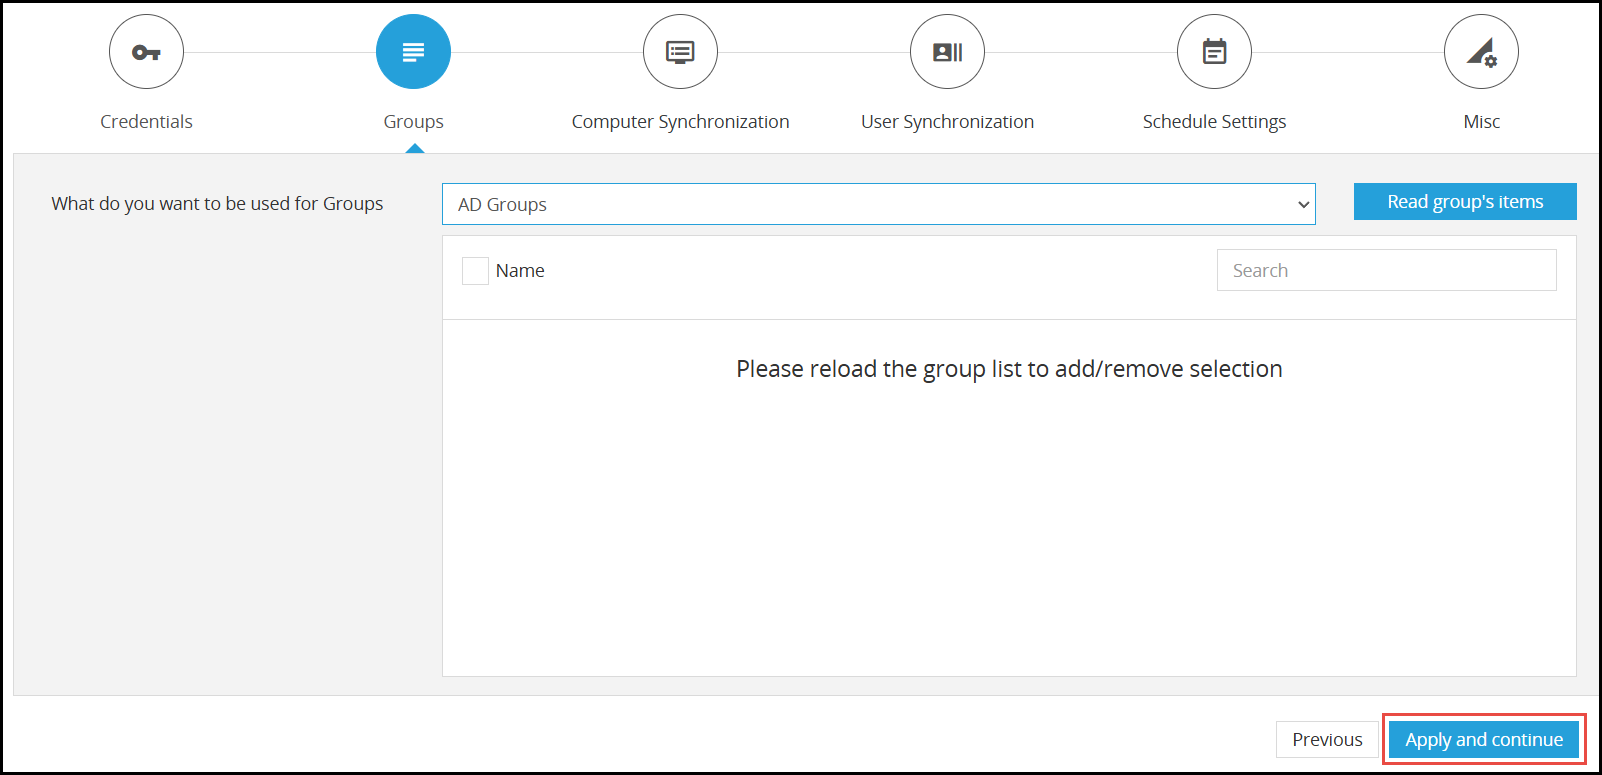
In the Group's tab, select the group for organizing assets from the What do you want to be used for groups? dropdown list. The available group options are:
- Departments - Departments filled out in the Active Directory
- Locations - Location information for asset categorization
- AD Groups - Security field filled out in the Active Directory
Click Apply and continue.
Step 3: Synchronize Computers
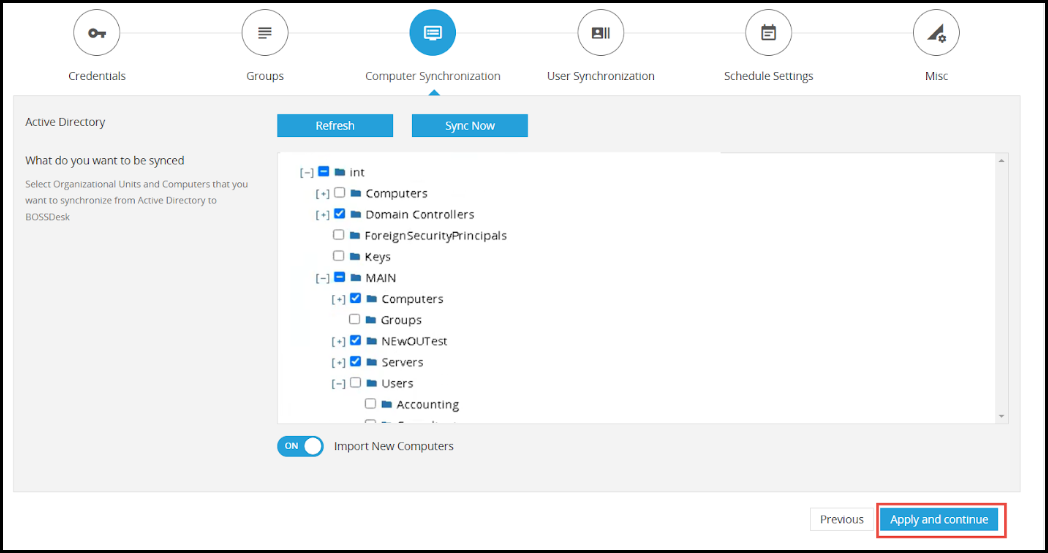
In the Computer Synchronization tab, select organizational units and computers you want to synchronize from Active Directory to BOSSDesk.
Note: The Import New Computers button must be enabled to allow the system to import new computers from the selected Organizational Units.
Click Apply and continue.
Step 4: Synchronize Users
The User Synchronization section is displayed.
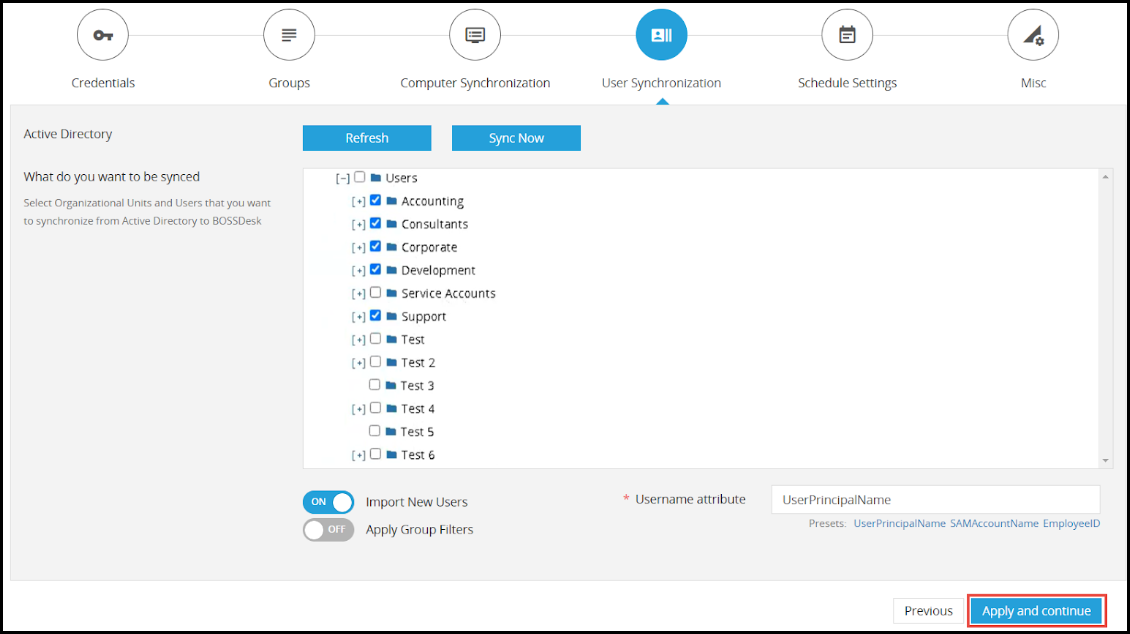
Select the users you want to synchronize from Active Directory to BOSSDesk.
Note:
- The Import New Users button must be enabled to allow the system to import new users.
- The Username attribute for identification must be either UserPrincipalName or SAMAccountName.
- You must select the Organizational Units (OUs) where the users are located to import their data.
- If a user is moved to the disabled user section, the system will archive that user.
Click Apply and continue.
Step 5: Configure Schedule Settings
The Schedule Settings section is displayed.
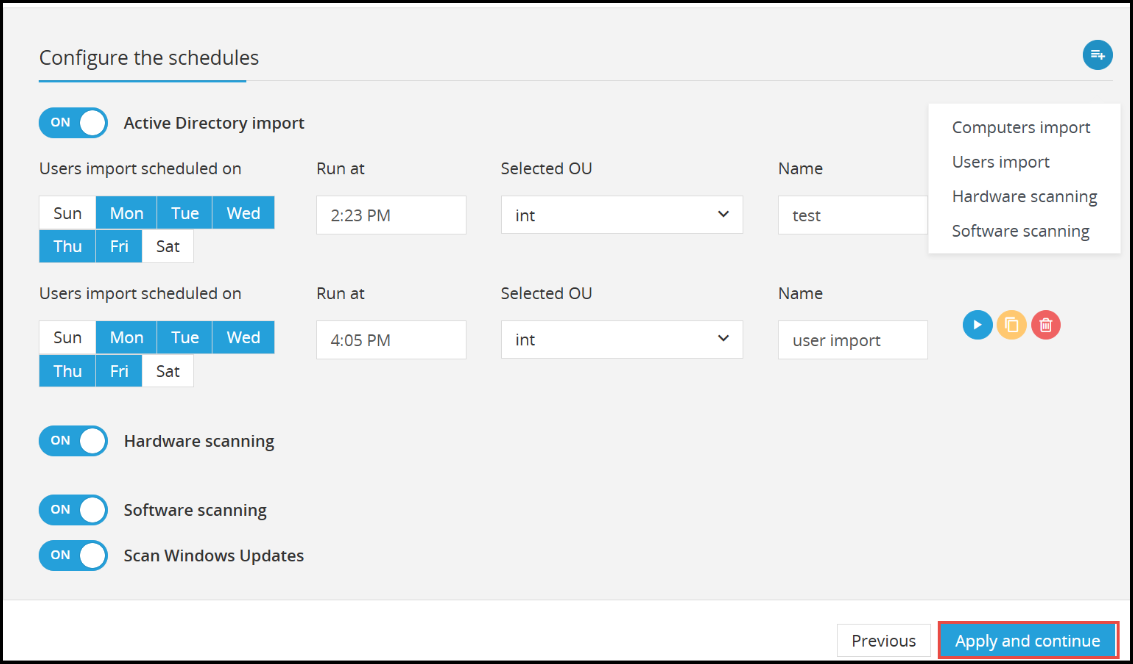
- Enable the Active Import Directory button to configure the user schedules.
- Select specific days from the Days options to import the users
- Enter the time for the schedule to run in the Run at field.
- Select the organizational unit or computer from which you wish to import the users from the Selected OU dropdown list.
- Enter a name for the import in the Name field.
- Enable the Hardware scanning button to configure the hardware schedules.
- Enable the Software scanning button to configure the software schedules.
- Enable the Scan Windows Updates button to configure the hardware schedules.
Note:
- A WMI call can be scheduled to run on all computers at a specific time.
- We recommend scheduling the WMI call around 9 or 10 AM, as most computers will be active.
- For hardware and software scans, scheduling around lunchtime is ideal, as most computers are usually turned on.
Click Apply and Continue.
Step 5: Configure Misc Settings
The Misc section is displayed.
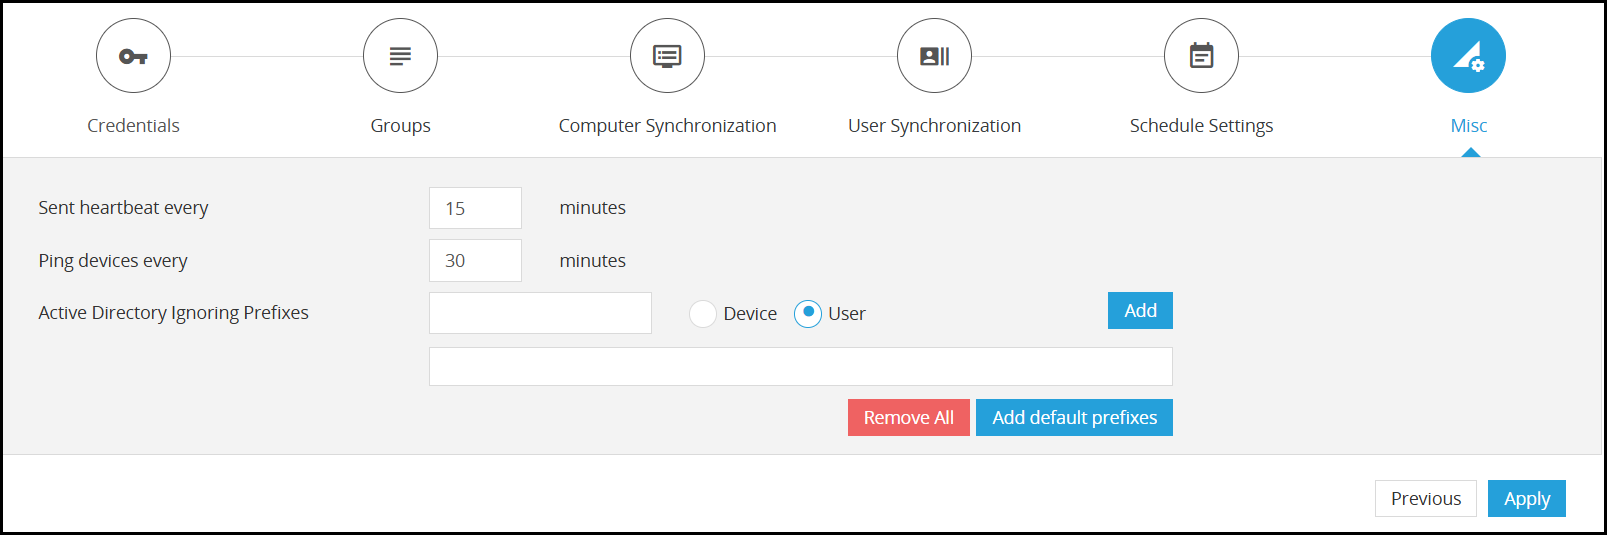
In this section, set time in minutes for sending heartbeats and pinging devices. Also set Active Directory ignoring preferences for user or device. Click Add. You can also set the default prefixes or remove all the timers. Once you set the timers, Click Apply.
The changes made to the selected SiteAgent are updated.